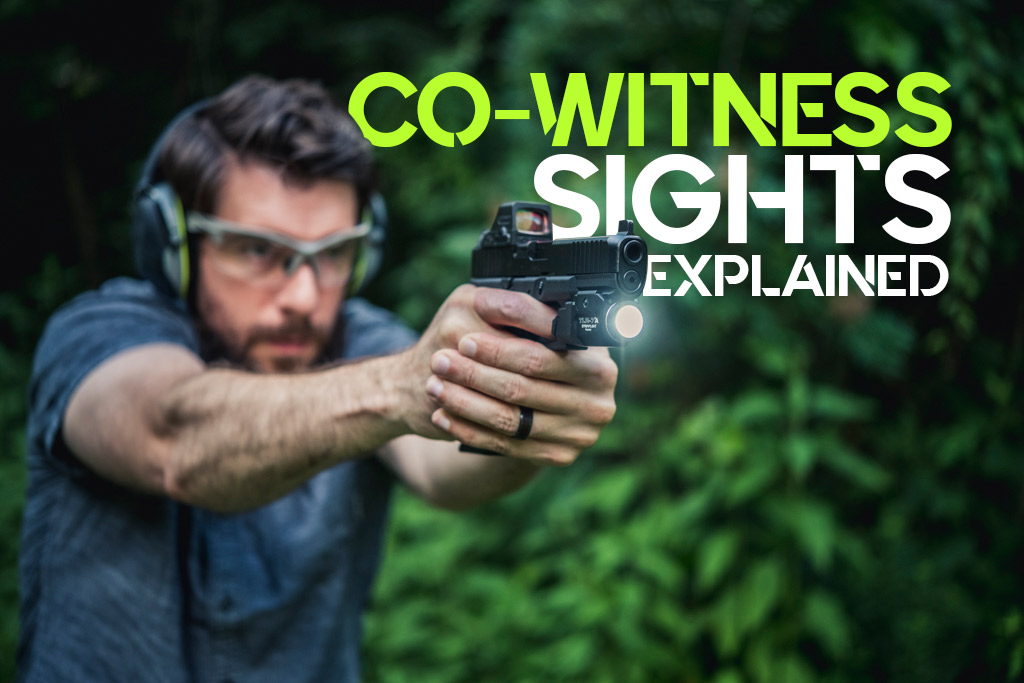
During your journey to becoming an ever more effective shooter, one of the more contested topics that you will encounter is co-witnessing. With that in mind, we have created this comprehensive guide to co-witness sights. We discuss what they are, how they impact your shooting experience, and if you need to co-witness at all.
What Are Co-Witness Sights?
The term co-witness refers to the interaction between iron sights and modern optics like a red dot. While both rifle and pistol optics can be co-witnessed, the term is most often used when referring to modern sporting rifles like the AR platform.
Your optic has a co-witness when the iron sights align with the red dot. The goal of this practice is to optimize the precision of your shot placement. Co-witness sights also serve as a backup option in case your red dot fails.
Types of Co-Witness Sights

If you prefer an uncluttered sight picture, no-witness, or lower 1/3 co-witness may be the way to go. If accuracy and quick transitions are important, absolute co-witness may be the route for you.
When it comes to co-witness sights, there are two main options available. These are known as absolute and 1/3 co-witness sights. We have also included pop-up sights, which are technically a sub-type of absolute sights. However, pop-up sights are unique enough to warrant being discussed as a standalone product.
Absolute Co-Witness
The first style of co-witness sights provides what is known as an absolute co-witness. These sights are fully visible when looking through your optic’s viewing window. The red dot should be aligned with the post on your front sight. In addition, the optic should be mounted nearer to the business end of your rifle when using absolute co-witness sights.
There are several benefits to this setup. You will be able to adjust to lighting changes more rapidly. You will also eliminate the need to realign your weapon because both optics are on the exact same viewing plane. However, absolute co-witness sights can make everything seem a bit cluttered.
Lower 1/3
As the name implies, “1/3 co-witness sights” are only visible in about 30% of your optic. This is accomplished by placing your optical sight on an elevated mount. Using a 1/3 co-witness leaves you with a less cluttered sight. This gives you optimal visibility when using your red dot.
A 1/3 co-witness also has a few drawbacks. The most apparent is that you will need to adjust your angle slightly when transitioning between the sights and your red dot. The optic is also off-center from the front of your rifle, which may make aiming a bit more unnatural until you get accustomed to the change.
Would you like to find out more about lower1/3 co-witness sights? Check out our helpful article at the link here.
Pop-up Sights
Pop-up sights are by far my favorite co-witness option on a rifle. I have found that pop-up sights strike the perfect balance between reliability and visibility.
While there are a few options out there, the Magpul MBUS and MBUS Pro pop-up sights are at the top of the food chain. I run one of these two versions on all of my rifles. But don’t just take my word for it. The Magpul MBUS sights are used by law enforcement and military personnel across the globe in the harshest environments.
Pop-up sights give you the ability to co-witness your red dot whenever you need to. They also flip down and out of the way if you want to use a single optic. If your red dot fails, you can flip the front and rear sights right back up at the touch of a button. What’s not to love?
Why Use Co-Witness Sights?

Co-witness sights give you the ability to switch between iron sights and optics for quick target acquisition.
As mentioned above, co-witness sights can help you improve your shot groupings, even when environmental factors change. Iron sights are tough to see in low-light conditions, but red dots are easy to spot. On the flip side, red dots can get washed out in extremely bright environments, but that dark post of your iron sight will stand out.
With that said, the average shooter is not all that concerned about taking their shot groupings down from 3” to 2”. Having great shooting fundamentals and a sight that is properly zeroed will have far more impact on your accuracy.
The primary reason that you should use co-witness sights is for that worst-case scenario. Whether you are in the military or just on an important hunt, co-witnessing your sights provides you with a back-up option in case that fancy optic fails.
If you have luck like I do, then those brand new batteries will fail just as you are preparing to make that important shot on that trophy buck. Fortunately for me, I co-witness my red dot and will still have an opportunity to take a well-aimed shot.
How To Zero Your Co-Witness Sights
For some reason, throwing two sets of sighting devices on a rifle tends to throw people off. While co-witnessing your sights may sound complex at first glance, it is actually incredibly simple.
Personally, I like to start with my iron sights. The first step is to get everything mounted on your rifle. This means installing your iron sights and optic. However, leave the optic turned off.
Run through the process of zeroing in your iron sights. Take your time. Make windage and elevation adjustments in reasonable increments to make sure that you get that rifle dialed in.
Once your iron sights are on point, turn on your red dot. As you prepare to take your first shot, acquire a good sight picture using that rear iron sight. Then line up that dot on your target and fire off a round.
Hopefully, the red dot has a factory zero and is in the ballpark. If not, then you have a little work to do. Continue making adjustments until the red dot is producing consistent, on-target groupings. Congratulations, you have just co-witnessed your rifle sights.
Which Co-Witness Sights Are Right For Me?

Adding pop-up sights to your gun gives you the option for no-witness, or co-witness with your optics with the flick of a finger.
Clearly, my favorite option on a rifle is the Magpul MBUS pop-up sights. However, they can be a bit pricey. A pair of the basic MBUS sights run right around $100 while the Pro’s are double that. If you have broken the bank with your new optic or just want to save a little cash, the standard iron sights that your rifle is already equipped with will work just fine.
If you are looking for optimal accuracy, or setting up a pistol for self-defense, then I suggest absolute co-witness. However, 1/3 co-witnessing works great as well if you are using a red dot with 2 MOA or less. You end up with a less cluttered sight picture and the option to use your iron sights anytime you need them.
If you have the time and the ammo, I recommend trying out different options. Chances are, you’ll find that you shoot one much better than the others. As long as it elevates your shooting experience and allows you to accurately place rounds, then run with it.
You may also like