When considering the ideal police duty belt setup, one of the first things to keep in mind is real estate. By real estate, I mean your body type. Slimmer individuals tend to have more trouble adjusting their belts because their belts are smaller. Larger individuals have more surface area on the belt to distribute equipment, making it easier to position items more comfortably.
The next thing I like to keep in mind is how I can comfortably set up everything towards the front of my belt, to avoid having anything in the back. As an officer wearing your gear all day, comfort is key. I like to avoid placing gear towards the back of the belt so that when I’m seated, nothing is poking or digging into my back. This is key when sitting in a patrol vehicle for an extended period.
Basic Gear Requirements
For the most part, agencies will supply you with a duty belt and not require you to place things in a specific area. The basic gear each officer will have on their belt is their firearm, handcuffs, taser, ASP baton (expandable baton), OC spray, “pepper spray,” flashlight, tourniquet, and magazines. Different agencies have their own rules and regulations for duty belts, but in my experience, the regulations are more focused on what to have on your belt, rather than where to place it.
For example, regarding less-lethal weapons, such as the ASP baton, Taser, and OC spray, most agencies require you to carry two out of the three on your duty belt. I’ve always chosen to drop the OC spray and go with the baton and taser.
Police Duty Belt: Equipment Placement
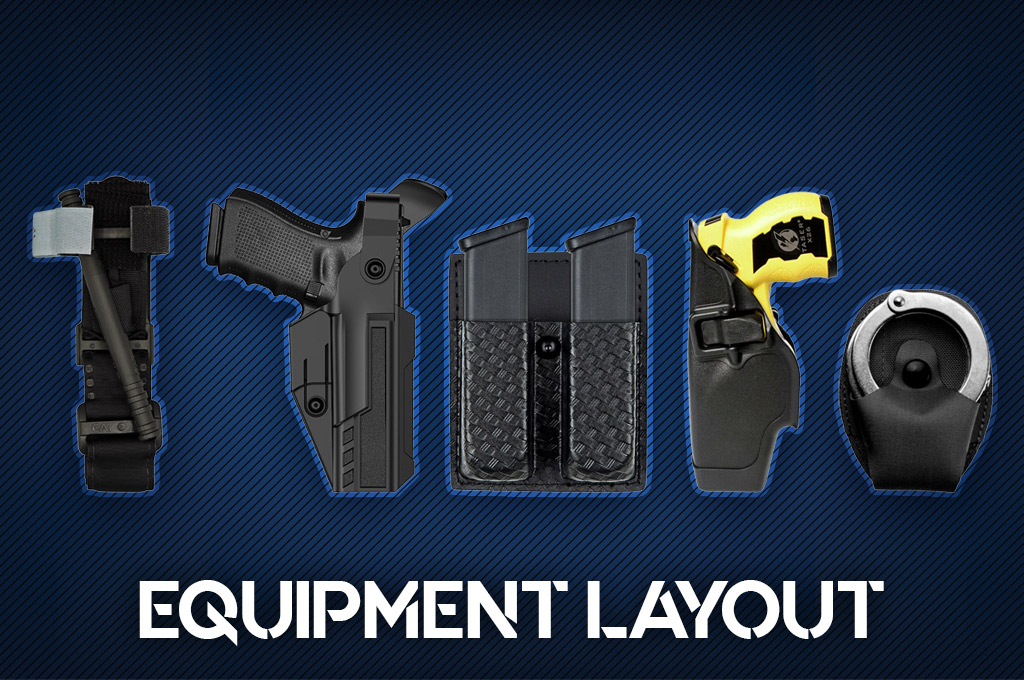
The equipment on your police duty belt should be organized and easy to access in an emergency.
There are many ways to create an effective police duty belt setup, but I chose this one based on convenience and personal experience. It’s a good place to start until you develop reasons to make adjustments based on your needs and personal style.
Firearm
A good rule of thumb is that you’ll want your arm to hang over the grip for weapon retention purposes. If your arm is blocking the grip, it’ll be more difficult for someone to grab hold of it. Make sure you have a good holster that is made for your firearm and has adjustable retention.
Taser
I’ve always liked my magazines behind my taser, with the taser towards the front left side of my hips. That’s because when I’m retrieving my taser, I prefer to cross-draw. Cross-draw is a technique where you position the taser on your non-dominant side with the handle facing toward the opposite side. This is great for safety reasons, especially in high-stress situations. Reaching to your non-dominant side to retrieve the taser is a great way to know you’re unholstering your taser and not your firearm.
Magazine Placement
Now, behind the taser, I place my magazines. I prefer my magazines here because when drawing them from their holster, nothing is restricting the opening. I’ve seen individuals place their magazines in front of their taser, but in some situations, the grip of the taser obstructs the magazine holster, making it difficult to draw the magazine.
Handcuffs
Now, let’s talk about handcuff placement. I’m right-handed, so I prefer my handcuff pouch in front of my firearm, towards the front right of my hip.
Imagine this: if you have to restrain someone, your hands are in front of you, and instead of having to reach around to your back to retrieve your handcuffs, they’re right in front of you. Behind the firearm, I like to place the ASP baton. I place a belt keeper in front of and behind the baton to ensure it stays in place. As I mentioned, I would rather not carry OC spray while on duty; however, if I were to, I would carry it in the same location as my ASP baton.
Flashlight & Radio
Behind the magazines, I like to place my flashlight. When using a flashlight, I prefer to hold it in my non-dominant hand. That way, if I need to draw one of my weapons, my dominant hand is free to do so.
Lastly, on my non-dominant side, I keep my radio. I prefer my radio towards the back of my non-dominant side because, in my experience, there aren’t many times when you have to take it out of its holster.
Tourniquet
You’ll want to be able to access your tourniquet quickly, without it ending up in the way of your other gear. It needs to be somewhere on your belt that is easy to reach with either hand. I prefer to keep mine somewhere in the front of my belt, generally forward of my holster.
Holsters & Belts
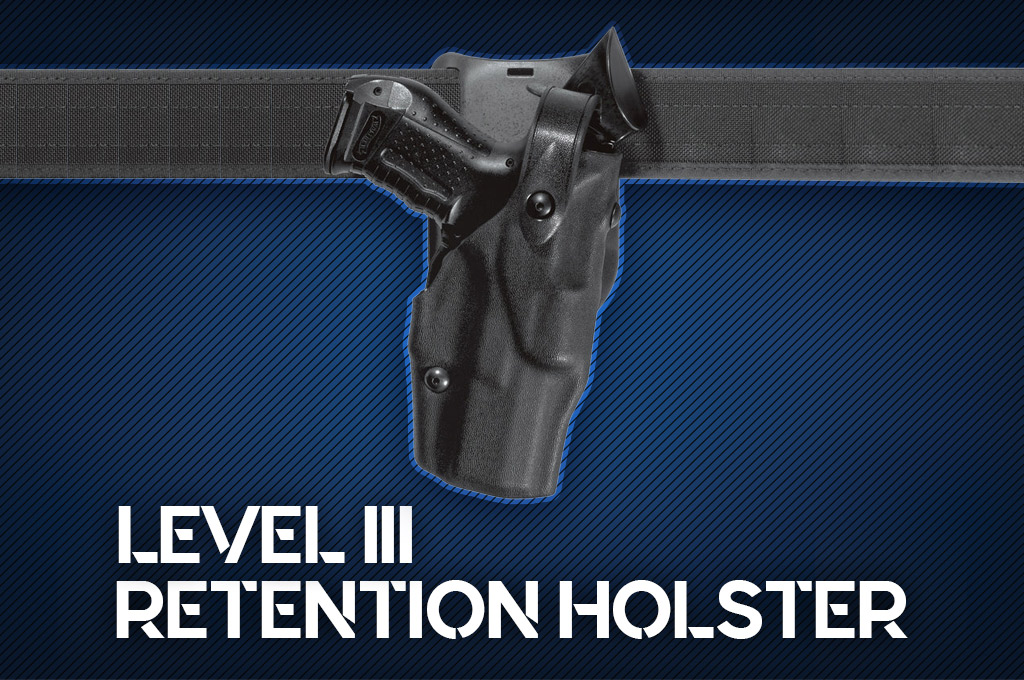
A level 3 retention holster is a must-have for keeping your firearm secure while on duty.
Each department has its own policies and procedures regarding the use of equipment. Still, if you’re able to purchase something different from what they issue, I would recommend doing so. There’s nothing wrong with what the department issues, but it’s usually basic stuff. When your life depends on it, you want good, reliable gear in your police duty belt setup.
For example, for a faster draw, I prefer open-top magazine pouches. Open-top pouches are simply magazine pouches that use friction retention to keep the magazine in the holster, as opposed to a flap or lid. They also leave a portion of the magazine exposed, allowing you to get a firm grip when drawing.
Open-top pouches boost ease and speed when drawing the magazine. They also come with two or three screws, allowing you to adjust the retention as needed. True, we’re speaking about milliseconds, the difference between opening a flap to retrieve your magazine and grabbing it to reload. However, when your life depends on it, milliseconds matter.
This doesn’t just apply to magazine pouches. There are also open-top handcuff pouches available, which I also prefer. When it comes to your firearm holster, I like a three-stage holster, also known as a level 3 holster. Level 3 holsters use three different retention mechanisms:
Friction retention
Uses screws to tighten and increase the tension to hold the firearm in its holster.
Active retention
This involves an additional mechanism that requires an action (like a thumb release) to disengage the firearm.
Secondary lock
This is the final stage in the three-stage process. This involves a rotating hood, lever, or other type of locking mechanism that secures the firearm.
When using a three-stage holster, practice is key. They may take some getting used to, however, when you get the hang of them, you can learn to draw your firearm pretty quickly. A good practice I perform before duty each day is drawing my firearm five or six times to ensure I can draw with ease.
Police Duty Belt
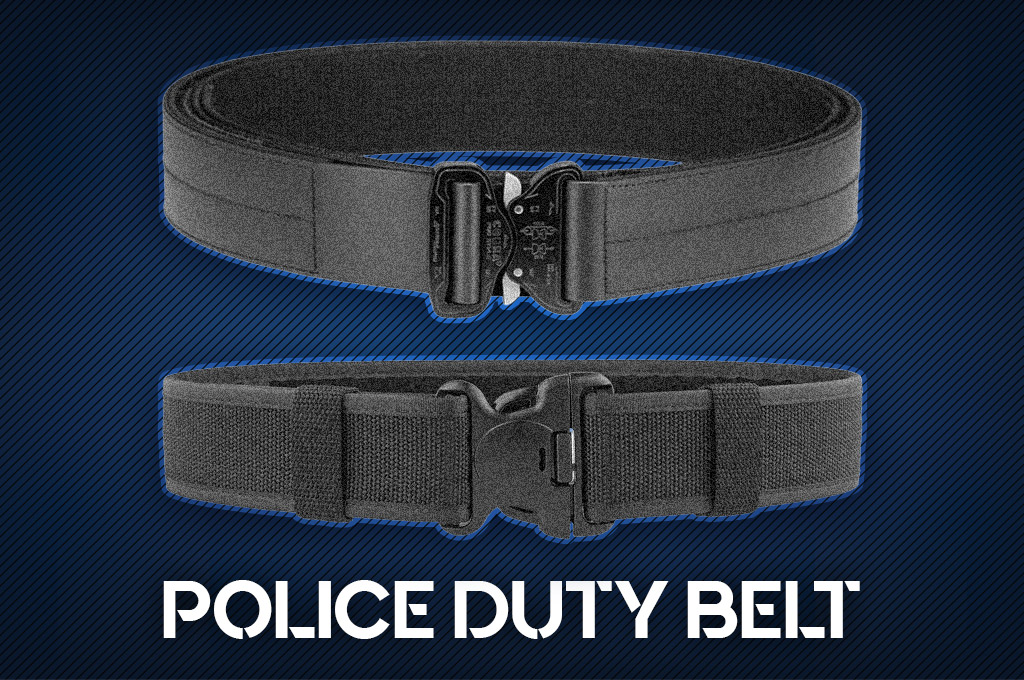
Police Duty Belts: A leather police duty belt (Top), and a nylon police duty belt (Bottom).
There are two basic kinds of duty belts: nylon and leather. There are different designs to choose from, such as basketweave, but the style of the belt doesn’t impact the comfort. I prefer a nylon belt due to its flexibility. I feel the nylon belts have a little more give than the leather belts. This pays off when moving around, climbing fences, or any other activity that requires the wearer to be agile.
Optional Gear
Up to now, we’ve spoken about basic equipment that almost every officer carries on duty. However, there are many other options officers equip themselves with, such as tourniquets and latex glove pouches. When it comes to the ideal police duty belt setup, my recommendation is one that prioritizes both comfort and security.
What do you feel comfortable wearing? Not only comfort as in comfortable to wear, but what you are comfortable using in the line of duty. This is based on your training and experience. Your equipment will evolve over time, adapting to your experience and job duties. When it comes to security, what equipment will ensure you make it home at the end of your shift? And not only you, but also your fellow officers.
Don’t Overdo It
When I was deployed, we used the term “gear Barbie”—you don’t want to be that guy. I knew someone who was a “gear Barbie,” and for this story, we’ll call him Bob. When we first arrived in-country and started running missions outside the wire, he’d wear every piece of gear available. Bob would look like a Call of Duty character.
After running a few missions, he realized how much everything weighed and how hot it was to carry so much gear. After that, Bob chose to downsize and only take the essentials—smart on Bob’s part. So the moral of this story is, don’t be like Bob before he wised up.
A good practice for creating the best police duty belt setup is to wear the essentials and have a few other items readily accessible. A place I liked to use is the driver’s door pocket. Here, I’d keep a tourniquet, extra magazines, an extra flashlight, gloves, and so on. I like to use this area because I can retrieve these items fairly quickly. I’d inform people on shift where I stored my extra gear, so if someone else needed to retrieve something for me, they knew exactly where it was.
Police Duty Belt: Use What Works For You
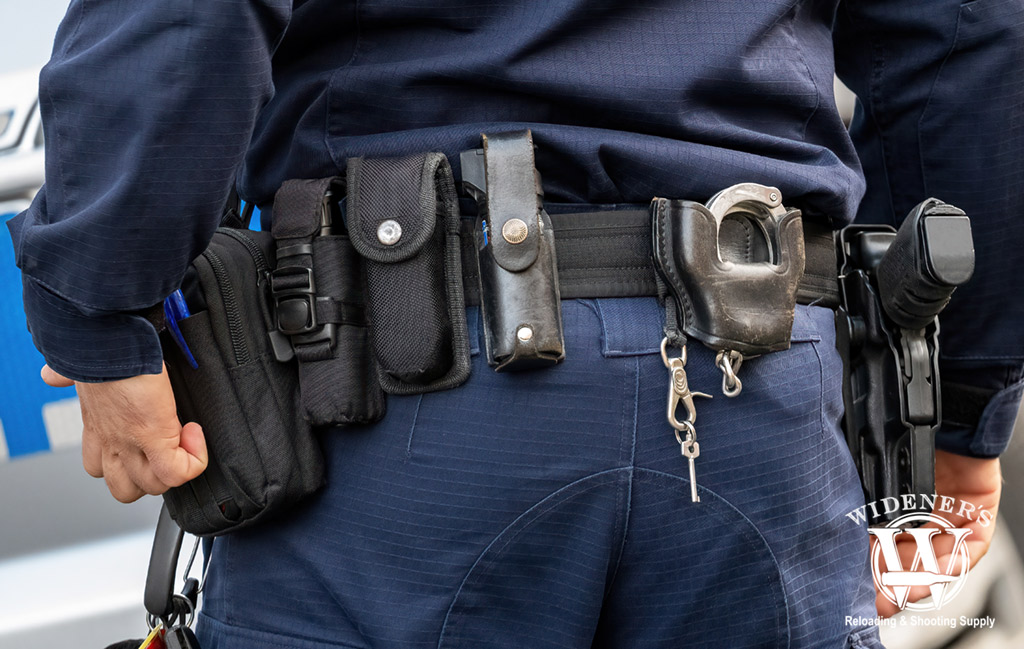
Your agency should supply you with a duty belt, but it’s up to you to configure it to meet your needs.
Ultimately, you need to carry what works for you and what feels comfortable. Check placement options, different holsters, read reviews, watch videos, and so on. You can also ask people’s opinions, but remember, they’re just that—opinions.
Also, what works for them may not work for you. When they tell you their gear “works better,” they should explain why; if they can’t, then go with what you prefer. Remember, at the end of the day, it’s you who will have to depend on the equipment.
If you’re curious to learn more about the body armor police officers wear, read this article to find out.
Guest writer Anton Jefferson served 15 years in the Army, 10 years in law enforcement, and 5 years on the SWAT team. He is a former police officer who works as a firearms and defensive tactics instructor.
